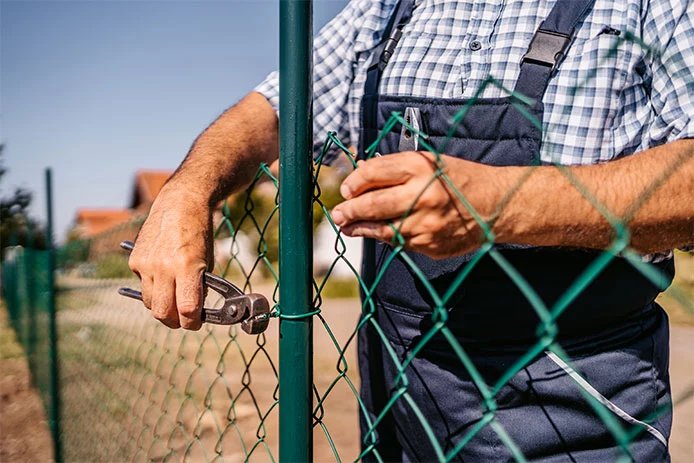
Part 1: Chain link fence repair
How to fix a sagging chain link fence
Sagging mesh — a wavy top edge, fabric that bellies between posts — is the most common chain-link complaint, and it's almost always a tension problem, not a fabric problem. How to fix a sagging chain link fence, in order:
-
Check the top rail and ties first
The mesh hangs from the top rail. If the rail is bent or a stretch of fence ties has snapped, the fabric sags no matter how tight the ends are. Replace broken ties (the little aluminum wires wrapping fabric to rail and posts) with new ones every 12–24 inches along the rail.
-
Re-tension at the tension bar
At the terminal (end/corner) post, the fabric ends in a vertical tension bar held by tension bands. Loosen the bands' bolts, hook a come-along or fence puller to the tension bar, and winch the fabric taut — firm and straight, not guitar-string tight. Re-tighten the band bolts while holding tension.
-
Take up the slack
Stretching usually frees a few inches of extra mesh. Unweave the excess: open the top and bottom loops of one vertical strand and spiral it out, then re-attach the fabric to the tension bar at the new length and trim ties to fit.
Torn or damaged mesh
Cut out the damaged section back to sound fabric, then weave in a patch: cut a piece from new fabric one strand oversize, and spiral a single strand through both edges to "sew" them together — chain-link is woven, so patches genuinely weave in and nearly disappear. Re-tie to the top rail and tension as above. Big damaged areas are easier replaced as a full section between terminal posts.
Bent top rail
A rail bent by a fallen limb or a climber can sometimes be straightened in place with leverage, but a kinked rail usually gets replaced: rails sleeve together at joints, so remove the ties, slide the damaged length out, slide the new one in, and re-tie. While you're there, check the rail ends and line-post caps for damage.
Leaning posts and rust
Terminal posts carry all the fabric tension, so a leaning terminal post sags the whole run. Re-setting or replacing a failed post follows the same concrete work as any fence — see the leaning fence guide. Surface rust on older fabric and fittings can be wire-brushed and touched with galvanized coating spray; fabric rusted through should be replaced, because it tears along the rust line under tension.
Chain-link is the budget repair
Most chain-link repairs land between $150 and $500 professionally — and many are an afternoon of DIY. Compare the numbers first.
Part 2: How to install a chain link fence
The build has a rhythm: framework first, then fabric. Planning basics — property lines, permits, HOA rules, and calling 811 before digging — are covered once in the general build guide; here's the chain-link sequence.
-
Set the terminal posts
Corner, end and gate posts (the "terminals") do the structural work. Set them in concrete — holes roughly 8–12 inches wide and 24–36 inches deep depending on fence height and frost line — plumb, braced, and at the finished fence height. Let the concrete cure before stretching fabric against them; tension will find any weakness.
-
Set the line posts
Run a taut string between the terminals at the top-rail height and set line posts along it, no more than 10 feet apart. Line posts can be set in concrete or driven, depending on soil and local practice; concrete is the safer default for a fence you want to stay straight.
-
Fit the framework: bands, caps and top rail
Slide tension bands onto the terminal posts, fit loop caps on the line posts, dome caps on the terminals, then thread the top rail through the loop caps and into the rail ends on the terminals. The framework should now read as one straight, level skeleton of the fence.
-
Hang and stretch the mesh
Unroll the fabric along the fence line, weave the tension bar through the end diamonds, and bolt it to the first terminal's tension bands. Then walk the fabric down the run, loosely tie it to the top rail to hold it up, and pull it taut with a fence puller/come-along attached to a second tension bar at the far terminal. Stretch until the diamonds barely deflect when pushed — over-stretching bows the terminal posts inward.
-
Tie it off and hang the gate
Weave out any excess fabric strand as described above, bolt the far tension bar to its bands, then tie the fabric to the top rail and line posts with fence ties every 12–24 inches. Hang the gate on its hinges with the latch at the height your local code requires, and check the swing clears the ground along its whole arc.
Chain-link fence questions, answered
How tight should chain-link fabric be?
Taut enough that the mesh deflects only slightly when you push it firmly by hand, with the top edge running straight along the rail. If terminal posts bow inward or diamonds distort into narrow slivers, it's over-stretched — back off, because over-tension shortens the posts' and bands' working life.
Can I add privacy to a chain-link fence?
Yes: woven privacy slats are the durable option (they thread through the diamonds and also add wind load, so posts and tension need to be sound), and mesh privacy screens are the cheap, temporary one. Note that slats make the fence a sail — a fence that stood fine open can lean after slats go in if its posts were marginal.
How much does chain link fence repair cost?
Professional chain-link repairs typically run $150–$500: a small fabric section often costs $75–$250, and replacing a bent top rail or longer fabric run works out around $15–$25 per linear foot. Full ranges and context are in our fence repair cost guide.
Is a chain-link fence a good DIY install?
One of the best — no other fence type is this forgiving of small errors, because tension can be adjusted at the end. The heavy parts are concrete work for the terminals and the stretching itself, which wants a helper and a rented fence puller. See DIY or hire a pro? for the honest split.